What Happens When Conventional Implant Drills Are Not Enough?
Most implant cases go smoothly with a standard set of Implant Osteotomy drills. We rely on them for the majority of our cases, and for good reason: they are familiar, predictable, and compatible with almost every implant system. But some clinical situations push past what a conventional drilling sequence can handle on its own.
At Universal Shapers, we design our instruments around these exact moments, the cases where dense cortical bone, sloped ridges, or crestal contouring needs push a standard drill sequence to its limit. In this guide, we look at what happens when conventional drills fall short, and which instruments we recommend picking up next.
Where Conventional Implant Drills Start to Struggle
Conventional Implant Osteotomy drills perform well in straightforward bone with a predictable entry point. Their limitations tend to show up in specific situations rather than across the board.
Common signs a conventional sequence is not enough:
-
The drill tip drifts across a sloped or angled cortical surface before it engages bone
-
Dense cortical bone resists the drill and generates more heat than expected
-
The crestal bone finishes with a flat, uniform rim that does not suit the planned restoration
-
Guided cases show a gap between the planned digital position and the actual osteotomy
None of these signs mean the case cannot proceed. They mean the case calls for an additional instrument built for that specific challenge, rather than pushing a conventional drill past its intended purpose.
We see these signs most often during treatment planning, when a CBCT scan or a difficult prior case flags a challenge before the patient ever sits in the chair. Catching these signals early gives you time to select the right instrument rather than adapting mid-procedure.
When Dense Cortical Bone Calls for Cortical Release Drills
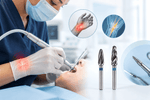
Dense cortical bone is one of the most common reasons a conventional sequence falls short. A standard Implant Osteotomy drill can struggle to advance cleanly through a thick cortical layer, which raises both drilling time and heat generation.
We designed our Cortical release drills specifically for this scenario. This step, often called implant osteotomy cortical release, targets only the cortical portion of the site and leaves the underlying cancellous bone undisturbed.
What implant osteotomy cortical release achieves:
-
Reduces resistance at the cortical plate before you advance to final drill diameter
-
Lowers heat buildup during the most demanding part of the sequence
-
Preserves cancellous bone density, which supports primary implant stability
-
Shortens the time your standard drills spend fighting dense bone
We recommend reaching for Cortical release drills whenever preoperative imaging shows thick, dense cortical bone, particularly in posterior mandibular sites. At Universal Shapers, we engineer these drills to manage that resistance without compromising the density your implant needs for primary stability.
When Entry Point Accuracy Calls for Bullet Shaped Drills
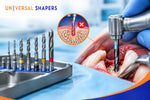
Conventional drills often struggle to hold their position at the very start of the osteotomy, especially on sloped ridges or curved cortical surfaces. A flat or pointed tip can skate sideways before it fully engages bone, which shifts the entire trajectory before drilling even begins.
We built our bullet shaped drills to solve exactly this problem. Their rounded, tapering tip settles into the intended entry point and self-centres before cutting begins in earnest.
Where we recommend bullet shaped drills over a conventional tip:
-
Sloped or angled ridges where a flat tip tends to drift
-
Guided cases, where initial centring accuracy carries through the entire sequence
-
Immediate implant placement adjacent to natural teeth, where precise entry point control matters most
Switching to a bullet shaped drill at the start of your sequence gives you a more stable foundation before your conventional drills take over for the remainder of the osteotomy.
When Crestal Bone Needs Scallop Shaped Drills
A conventional sequence finishes the osteotomy but leaves the crestal bone as a flat, uniform rim. In many cases, that outcome works fine. In esthetic zone cases and full-arch restorations, it often does not.
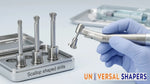
We manufacture our scallop shaped drills to contour that crestal bone once the osteotomy reaches full depth. Their flared cutting surface shapes the bone into a scalloped profile that better matches natural tooth anatomy.
What scallop shaped drills add to your sequence:
-
A more natural transition between bone and the future restoration
-
Additional space for soft tissue to develop around the implant collar
-
A better-defined seating surface for healing abutments and prosthetic components
We recommend adding Scallop shaped drills as a final step after your conventional osteotomy drills, rather than as a replacement for them.
Building a Sequence That Combines Conventional and Specialized Drills
We do not see conventional and specialized drills as competing options. In most of the cases we support, clinicians combine both, using conventional Implant Osteotomy drills for the bulk of the osteotomy and adding specialized instruments only where the case demands them.
A combined sequence might look like this:
-
A bullet shaped drill establishes a stable, centred entry point
-
Progressive conventional drills widen the osteotomy to the planned diameter
-
Cortical release drills manage dense cortical bone through implant osteotomy cortical release, where needed
-
Scallop shaped drills contour the crestal bone once the osteotomy is complete
We design our kits so clinicians can move between these instruments without switching to unrelated product lines or renegotiating compatibility case by case.
Adjusting Technique When You Add a Specialized Drill
Bringing a Cortical release drill, bullet shaped drill, or Scallop shaped drill into your sequence for the first time calls for a short adjustment period. Each of these instruments engages bone slightly differently than a conventional drill, and understanding that difference before your first complex case makes the transition smoother.
A few habits we recommend when adding a specialized drill to your protocol:
-
Practice the new drilling motion on models before your first live case
-
Review our sequencing and speed guidance for each instrument, since settings that work for a conventional drill do not always transfer directly
-
Involve your surgical assistant early, since tray setup changes slightly with additional instruments in the sequence
-
Start with a straightforward case that presents just one of these challenges, rather than a case combining several at once
We built our training materials and technique guides specifically to shorten this adjustment period, so clinicians can bring a specialized drill into their protocol with confidence rather than trial and error.
Recognizing the Signs Before You Reach for a Specialized Drill
We encourage clinicians to review imaging and case details before surgery, so the need for a specialized drill does not surface as a surprise mid-procedure. A few questions we recommend asking during treatment planning:
-
Does the CBCT show dense cortical bone that could slow a conventional sequence?
-
Does the ridge present a sloped or angled entry point that a flat drill tip might not hold?
-
Does the case call for a defined crestal contour, such as an anterior esthetic restoration?
-
Does the protocol involve a surgical guide, where entry point accuracy carries extra weight?
Answering these questions ahead of time lets you bring the right instruments to the tray from the start, rather than adapting mid-surgery.
Why We Build Our Instruments as a Coordinated System
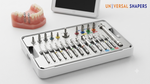
We manufacture our Implant Osteotomy drills, Cortical release drills, bullet shaped drills, and Scallop shaped drills to work together as one system rather than as separate, unrelated products. Diameters, lengths, and connection interfaces stay consistent across the range, so moving from a conventional drill to a specialized one does not introduce compatibility guesswork.
We believe this consistency matters most in the exact moments this article covers, when a standard sequence needs support and the clinician has little time to troubleshoot mismatched instruments.
Conclusion
Conventional implant drills handle most cases well, but dense bone, sloped ridges, and crestal contouring needs eventually push past what a standard sequence can manage alone. Recognizing these moments, and having cortical release drills, bullet shaped drills, and scallop shaped drills ready to support your conventional sequence, keeps your protocol predictable even in more demanding cases.
We invite you to explore our full range of specialized implant drills at Universal Shapers, where you can find instruments built to work alongside your existing sequence rather than replace it.