How to Choose the Right Implant Osteotomy Drill for Different Bone Types
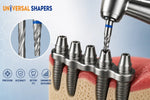
Selecting the correct Implant Osteotomy Drill is one of the most important decisions a dentist makes during surgical planning. The bone quality at the implant site directly affects how the drill performs and how well the implant integrates. Not all bones are the same. Some areas are dense and hard, while others are soft and spongy. Using the wrong drill or the wrong technique can lead to overheating, poor stability, or even implant failure. This guide explains how to choose the right Osteotomy Drill for Dental Implants based on the bone type you are working with.
Understanding Bone Density Types
The most common way to classify bone density is the Lekholm and Zarb system. It divides bone into four categories.
-
D1 Bone: Very dense cortical bone. This is the hardest type.
-
D2 Bone: Thick cortical bone with dense trabecular bone underneath. This is considered ideal for implants.
-
D3 Bone: Thin cortical bone with less dense trabecular bone.
-
D4 Bone: Very soft cancellous bone with almost no cortical layer.
Each type requires a different drilling approach. The goal is always the same: achieve good primary stability without damaging the bone.
Drilling in D1 Bone (Very Dense Cortical Bone)
D1 bone is found mostly in the anterior mandible. It is hard and offers high resistance. The main challenges here are heat generation and the risk of over-compressing the bone. Drills can get very hot in dense bone. If the temperature goes above 47 degrees Celsius, the bone cells can die. This is called bone necrosis.
For D1 bone, you need a full drilling sequence. This means using a pilot drill, twist drills, intermediate drills, and a final drill. The drills must be sharp and designed for hard bone. Cortical drills or countersinks are very helpful. They reduce the pressure on the outer layer of bone. You should also use a lower drill speed to minimize heat. Heavy external irrigation is essential. Water must flow continuously to cool the drill and wash away debris.
The Best implant osteotomy drill for dense bone is one that cuts efficiently without creating too much friction. Sharp cutting edges and good flute design are important features. Some dentists also use a slightly larger final drill in dense bone. This creates a little more space and prevents the implant from being inserted with excessive torque.
Drilling in D2 Bone (Ideal Implant Bone)
D2 bone is the most forgiving type. It offers good resistance but is not too hard. The anterior maxilla and posterior mandible often have D2 bone. This type provides excellent primary stability.
A standard drill sequence works well for D2 bone. Conical or tapered drills are a good choice because they match the shape of many modern implants. You can use normal speed and torque. Irrigation should be adequate but does not need to be excessive. The main goal is to follow the recommended protocol for your implant system. With D2 bone, most standard Dental Implant Drills will perform well.
Drilling in D3 Bone (Soft Bone with Thin Cortical Layer)
D3 bone is found in the posterior maxilla. It has a thin outer layer and softer bone inside. The main risk here is micromovement of the implant. Primary stability can be compromised because the bone does not hold the implant tightly.
For D3 bone, you should undersize the osteotomy. This means using a final drill that is slightly smaller than the implant diameter. The idea is to let the implant threads engage the bone more aggressively. You can use fewer drills. In some systems, you can skip the widest drill. Tapered drills or bone-condensing drills are excellent for soft bone. They compress the bone instead of removing too much.
Osseodensification burs is also a good option. They preserve bone and make it denser around the implant. When drilling in soft bone, you should minimize irrigation inside the cancellous portion. Too much water can wash away valuable bone chips. Focus the irrigation mainly on the cortical entry point.
Drilling in D4 Bone (Very Soft Cancellous Bone)
D4 bone is the most challenging type. It is found in the posterior maxilla and sometimes in areas with poor bone quality. This bone offers very low resistance. Primary stability is difficult to achieve without the right technique.
Significant undersizing of the osteotomy is critical for D4 bone. You should use only the pilot drill and possibly one intermediate drill. Avoid over-drilling. Osseodensification burs or bone-expanding drills are very useful here. They condense the soft bone and improve stability.
Low irrigation is recommended inside the cancellous bone. You want to keep the bone chips in the osteotomy site. These chips help with healing and stability. Slower drilling speeds can also help prevent the removal of too much bone. The goal is to preserve as much bone as possible and create condensation around the implant.
Drill Design and Geometry
The design of the Implant Osteotomy Drill matters a lot. Different shapes work better in different bone types.
-
Spiral or Twist Drills: These are the most common. They work well in most bone types because they cut efficiently and remove debris.
-
Tapered Drills: These are excellent for soft bone. They compress the bone as they go in, which improves stability.
-
Cortical Drills or Countersinks: These are ideal for hard bone. They reduce stress on the cortical layer and make implant insertion easier.
-
Osseodensification Burs: These are perfect for D3 and D4 bone. They do not remove bone. Instead, they preserve and densify it.
Some drill kits also include specialized shapes. For example, some systems include bullet shaped drills and scallop shaped drills. The bullet drills have a flared portion that adds to the length and diameter of the osteotomy in increments. This design helps create a cortical release ring around the implant. It avoids pressure on the crestal bone and prevents future bone loss.
Working in Soft Bone vs. Hard Bone
The approach to drilling changes based on bone density. In soft bone (Type III and IV), it is recommended to undersize the osteotomy. For example, if you are preparing a site for a 5mm diameter implant in soft bone, you might use a 3.5mm drill. The flare on the drill adds to the diameter, leaving a small release ring around the implant. This avoids pressure on the crestal bone while creating stability in the cancellous portion.
In hard bone (Type I and II), you need to create a flare to achieve a cortical release ring. This can be done with bullet drills or scallop shaped drills. The cortical release drills are used to release the cortical portion of the osteotomy without changing the density of the cancellous bone. This helps advance the implant placement smoothly.
General Tips for Optimal Drilling
Regardless of the bone type, there are some universal rules to follow.
-
Always monitor the temperature. Heat is the enemy of bone.
-
Replace worn drills regularly. Dull drills generate more heat and cut poorly.
-
Use copious irrigation, especially in dense bone.
-
Follow the recommended drill protocol for your implant system.
-
Consider the implant design. Tapered implants may need different drills than straight ones.
Conclusion
Choosing the right Osteotomy Drill for Dental Implants is not a one-size-fits-all decision. The bone type at the surgical site should guide your choice. Dense bone needs sharp, efficient drills and heavy irrigation. Soft bone needs undersizing and bone-condensing techniques. Understanding these differences will improve your surgical outcomes. The right Implant Osteotomy Drill will help you achieve primary stability, promote good healing, and ensure long-term success for your patients. Take the time to match your drill selection to the bone quality. Your patients will benefit from better results and fewer complications.