The 7 Steps of Dental Implant Placement: What Happens During the Procedure?
Many people feel nervous before an implant appointment, and that is completely normal. Most of that worry comes from not knowing what to expect. Once you understand each stage, the dental implant placement procedure feels far less mysterious.
At Universal Shapers, we manufacture the precision drills that dentists and oral surgeons use during implant surgery. We know the procedure from the instrument side, and we want to walk you through it in plain language. This guide explains what happens at each stage and why each one matters.
Step 1: Consultation and Examination
Every implant journey starts with a conversation. Your dentist reviews your medical history, checks your gums and remaining teeth, and asks about your goals. Conditions such as diabetes, smoking, and gum disease can affect healing, so your dentist needs the full picture.
Your dentist will also take images, usually X-rays and often a 3D cone beam scan. These images show the height, width, and density of your jawbone, along with the position of nerves and sinuses. This information shapes every decision that follows.
Step 2: Treatment Planning
Next, your dentist or surgeon builds a plan. Using the scan data, they decide how many implants you need, where each one should go, and what size and angle will work best.
Many practices now use dental implant surgery planning software, and some create a custom surgical guide from the plan. The guide fits over your teeth or gums and directs the drill to the planned position during surgery. This approach supports accuracy, though it does not replace the surgeon's skill and judgment.
What a good plan covers:
-
The number, size, and location of each implant
-
Whether you need a tooth extraction or bone grafting first
-
The type of anesthesia or sedation that suits you
-
The expected healing timeline and follow-up visits
Step 3: Preparing the Site (Extraction or Bone Grafting if Needed)
Some patients can move straight to surgery. Others need preparation first.
If a damaged tooth still sits in the planned position, your dentist removes it. In some cases, they place the implant on the same day as the extraction. In others, they let the site heal for a few months first.
If your jawbone lacks enough volume to hold an implant securely, your dentist may recommend a bone graft. Grafting adds material to the area and gives the implant a stronger foundation. Healing after a graft usually takes several months, and your dentist will tell you what to expect in your case.
Step 4: Anesthesia and Preparing the Implant Site
On surgery day, your dentist numbs the area with local anesthesia. Many practices also offer sedation for anxious patients. You stay comfortable and should not feel pain, though you may notice pressure and vibration.
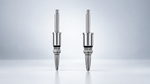
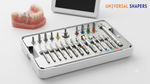
Your surgeon then makes a small opening in the gum to expose the bone. Now comes the stage where drills do their most important work. Using a series of implant osteotomy drills in gradually increasing diameters, the surgeon creates a precise channel in the bone. Irrigation runs throughout to keep the bone cool, because overheating can harm the surrounding tissue.
Specialized drills can add precision at this stage:
-
Bullet shaped drills have a rounded tip that settles into the entry point and helps the drill stay on its intended path
-
Cortical release drills help the surgeon manage dense outer bone
-
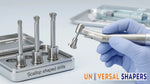
Scallop shaped drills contour the bone at the top of the site, which creates a more natural seat for the healing components
Surgeons choose these instruments based on your bone quality and your treatment plan.
Step 5: Placing the Implant
Once the site is ready, the surgeon places the implant. The implant is a small titanium or zirconia post that acts as an artificial tooth root. The surgeon threads or presses it into the prepared channel, then checks that it sits firmly at the planned depth and angle.
Firm initial stability matters a great deal. It gives the implant a solid start while your bone begins to heal around it. The surgeon then closes the gum with stitches, or attaches a healing cap that stays visible above the gum line.
Most people go home the same day. Your dentist will give you instructions for rest, diet, and cleaning the area.
Step 6: Healing and Osseointegration
Over the following weeks and months, your jawbone grows into the surface of the implant. Dentists call this process osseointegration. It turns the implant into a stable anchor for your new tooth.
Healing time varies from person to person. Some patients heal in a few months, while others need longer, depending on bone quality, the implant site, and overall health. During this period, you will attend follow-up visits so your dentist can check your progress.
Habits that support healing:
-
Follow your dentist's cleaning and diet instructions closely
-
Avoid smoking, which interferes with healing
-
Attend every follow-up appointment
-
Contact your dentist promptly if you notice swelling, pain, or bleeding that seems unusual
Step 7: Abutment and Final Crown
Once your dentist confirms that the implant is stable, you move to the restorative phase. Your dentist attaches an abutment, a small connector that links the implant to the replacement tooth. Sometimes this happens at the same visit as the final crown, and sometimes it requires a short separate appointment.
Your dentist then takes impressions or a digital scan, and a dental lab crafts your crown to match your natural teeth. At the final visit, your dentist fits the crown, checks your bite, and makes any small adjustments.
At this point, the dental implant steps are complete, and you have a tooth that looks, feels, and functions much like a natural one. With good home care and regular checkups, implants can last for many years.
Is the Procedure Painful, and What Is Recovery Like?
Most patients describe the surgery itself as more comfortable than they expected, since local anesthesia numbs the area completely. Afterward, mild soreness, swelling, and minor bruising are common for a few days. Your dentist may recommend over-the-counter pain relief, a soft diet, and gentle cleaning around the site.
Recovery after dental implant surgery depends on the number of implants, the complexity of the case, and your general health. Many people return to normal routines within a day or two, while larger cases may need a little more rest. If pain increases instead of fading, call your dentist rather than waiting.
Why Instrument Quality Matters Throughout the Dental Implant Process
Patients rarely see the instruments, but those tools influence how smoothly the dental implant process unfolds. Sharp, precisely manufactured drills cut cleanly, generate less heat, and help the surgeon follow the plan. That precision supports a more predictable surgery and a more comfortable recovery.
This is the standard we hold ourselves to at Universal Shapers. We design our drills to cut consistently, hold tight tolerances, and perform reliably through repeated use. Behind every successful implant, there is a surgeon's skill and a set of instruments built to support it.
What to Ask Your Dentist Before Treatment
A confident patient is a well-prepared patient. Consider asking your dentist:
-
How many implants will I need, and where will they go?
-
Will I need a bone graft or extraction first?
-
What type of anesthesia will you use?
-
How long will each phase of healing take?
-
What does the full cost include?
Clear answers help you feel comfortable and informed before you begin.
Final Thoughts
Understanding dental implant placement removes much of the fear around it. The journey moves through seven clear stages: examination, planning, site preparation, surgery, implant placement, healing, and final restoration. Each stage builds on the one before it.
Every case is different, so always rely on your own dentist or surgeon for advice about your situation. To learn more about the precision instruments behind modern implant surgery, explore what Universal Shapers offers.