What Are Osteotomy Drills and How Are They Used in Implant Surgery?
Every dental implant starts with a precisely shaped channel in the jawbone. Surgeons cut that channel with specialized drills, and the quality of that step affects stability and healing.
This guide explains what these drills are, which types exist, and how they are used in surgery. It also covers heat control, guided workflows, and what to look for in a drill set.
Key Takeaways
-
An osteotomy is the channel in the jawbone that holds the implant. Drills create it in stages.
-
Most protocols start with a small pilot drill and finish with the final implant diameter.
-
Heat is the main biological risk. Irrigation, sharp drills, and correct speed keep bone temperature in check.
-
Bone density, implant design, and nearby anatomy decide the drill sequence.
-
Guided surgery and organized drill kits add control, but the manufacturer's protocol still comes first.
What Are Implant Osteotomy Drills?
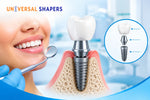
A dental implant needs a channel in the bone that matches its size. Surgeons cut that channel with implant osteotomy drills, which are specialized cutting instruments for bone. The channel itself is called an osteotomy.
Unlike a drill used on tooth structure, an implant osteotomy drill cuts bone. Its flutes carry debris away from the cutting site, and many drills carry depth markings. It runs in a surgical handpiece at controlled speed, usually with saline irrigation.
Precision matters because the implant depends on direct contact with bone to stabilize and integrate. A site that is too narrow can compress bone. One that is too wide can leave the implant loose.
Main Types of Drills Used in Implant Osteotomy
Brands differ, but most sets of implant osteotomy drills follow a similar progression.
-
Round bur: Marks the entry point. A small round bur also helps prevent chatter of the first twist drill.
-
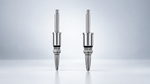
Pilot drill: Starts the osteotomy by perforating the cortical plate. It sets position and angle, and is often about 2 mm wide.
-
Twist drills: Widen the site step by step. Diameters usually increase by 0.2 to 0.7 mm between drills.
-
Tapered and step drills: Cut a wider top and a narrower tip to match tapered implants. Some systems use them to shorten the sequence.
-
Cortical and countersink drills: Widen the crestal portion in dense bone. This lets the implant neck seat without excess pressure.
-
Profiling and scallop drills: Shape the bone around the osteotomy to suit the restoration and soft tissue. Bullet shaped drills, scallop-shaped drills, and cortical release drills are examples.
How an Osteotomy Is Prepared, Step by Step
The exact protocol depends on the implant system. This sequence shows the general logic behind bone drilling for dental implants, so always check the manufacturer's instructions.
-
Expose and mark the site. The surgeon exposes the bone with a flap or works flapless. The entry point is then marked with a round bur or pilot drill.
-
Drill the pilot hole. A narrow drill sets position, angle, and planned depth. Many systems offer a direction indicator to check the angle.
-
Widen the site in stages. Progressively wider drills enlarge the osteotomy. Sequential drilling is a standard way to limit thermal damage.
-
Keep irrigation constant. Sterile saline at room temperature cools the drill and flushes out debris.
-
Use an up-and-down motion. Intermittent movement lets irrigation reach the flutes and clear bone debris. Some tapered shaping drills are an exception, so follow their instructions.
-
Finish with the final drill and shape the crest. The last drill sets the final diameter. In dense bone, a cortical drill widens the top of the site.
-
Verify depth and place the implant. The surgeon checks depth against the drill markings, then inserts the implant following the system's protocol.
What Decides the Drill Sequence
No single sequence suits every patient. Clinicians adjust the protocol to the site.
-
Bone density: Dense bone often needs extra cortical widening. Soft bone may need fewer or narrower final steps, because some protocols under-prepare the site to raise initial stability.
-
Implant design: Tapered and straight implants need different drill shapes. Drill diameters and lengths must match the implant system.
-
Anatomy: Structures such as the inferior alveolar nerve and maxillary sinus limit working depth. Some drills cut up to 1 mm beyond the implant length, so plan a safety margin.
-
Restorative plan: The planned crown position sets the angle and depth. Profiling drills can then shape the crest to suit the abutment.
Speed limits also vary by manufacturer. One pilot drill instruction sheet specifies 1,000 to 1,500 rpm, while another system sets a 2,000 rpm maximum.
Guided Surgery and Drill Kits
Guided surgery transfers a digital plan to the mouth through a surgical template. Drills pass through sleeves in that guide, which control position and angle.
Accuracy depends on the whole workflow, not the template alone. A 2026 systematic review links accuracy to planning, guide design, manufacturing, instrumentation, and clinical execution.
One in vitro study compared guided approaches. Using the guide only for the pilot drill was less accurate than fully guided surgery, but better than freehand.
A guide controls direction, but implant osteotomy drills still cut the bone, so their condition and fit matter.
What to Check Before Buying a Drill Kit
Choosing a dental implant drill kit comes down to a few practical checks.
-
Compatibility with your implant system, handpiece, and any guide sleeves.
-
Drill diameters and lengths that cover your usual implant sizes.
-
Clear depth markings that stay legible after repeated sterilization.
-
Cleaning and sterilization instructions from the manufacturer.
-
A way to replace worn drills, because drill wear raises bone temperature.
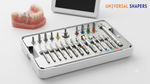
Universal Shapers offers a Guided Surgical Kit as one example. The manufacturer states that it includes a pilot drill and multiple burs. It works with standard surgical handpieces and most implant systems, and can be used with a guided sleeve.
Heat, Wear, and Common Drilling Errors
Bone tolerates heat poorly. Reviews commonly cite 47°C held for one minute as the point where thermal damage begins. A systematic review of animal studies reported thresholds between 47°C and 55°C for one minute. Thermal necrosis can impair healing and contribute to early implant failure.
These habits help limit heat:
-
Irrigate with sterile saline throughout the cut.
-
Stay within the manufacturer's speed limit.
-
Use intermittent motion so debris and heat can clear.
-
Replace dull drills promptly.
-
Follow the full sequence instead of skipping steps.
These mistakes cause avoidable problems:
-
Lateral force: Side pressure can bend or fracture a drill.
-
Drilling without irrigation: One manufacturer tells clinicians to stop if irrigation stops.
-
Mismatched drills: Diameters and designs must follow the protocol of the implant system.
-
Skipping the angle check: A pilot hole in the wrong direction carries through every later drill.
Conclusion
Osteotomy drills turn a surgical plan into a precise site for the implant. The right sequence depends on bone density, implant design, and nearby anatomy. Sharp drills, steady irrigation, and correct speed protect the bone throughout.
Guided workflows and well-organized kits add control, but the manufacturer's protocol still comes first. Clinicians comparing options can review the guided surgical kit and check each drill's dimensions and system compatibility before ordering.