Bone Drilling for Dental Implants: 7 Common Mistakes and How to Avoid Them
Most implant complications trace back to small decisions made during site preparation. A skipped drill, a pause in irrigation, or a drill that has seen too many cycles can shape the outcome long before you place the implant. The good news is that most of these errors are easy to prevent once you know where to look.
At Universal Shapers, we talk with clinicians about their drilling protocols every day. Here are the seven mistakes we see most often in bone drilling for dental implants, along with practical ways to avoid each one.
1. Skipping Steps in the Drill Sequence
Time pressure tempts many clinicians to jump from a pilot drill straight to a larger diameter. It feels efficient, but it forces the drill to remove more bone at once. That increases resistance, raises heat, and makes it harder to keep the trajectory straight.
How to avoid it:
-
Follow the manufacturer's recommended sequence for your implant system
-
Move through each diameter in order, even in softer bone
-
Treat the sequence as a protocol, not a suggestion
Progressive widening gives you more control at every stage, and it usually costs only a few extra seconds per case.
2. Allowing Heat to Build Up
Bone tolerates heat poorly. Classic research on bone healing has linked sustained temperatures around 47 °C to thermal damage, which can compromise osseointegration. Dense bone, dull drills, and long drilling sequences all raise the risk.
How to avoid it:
-
Use copious irrigation throughout the sequence, and keep the coolant reaching the cutting surface
-
Drill with an intermittent, pumping motion so the flutes clear debris and the site stays cool
-
Follow the speed range your implant system recommends
-
Pay extra attention in dense cortical bone, where heat builds fastest
Guided sleeves can limit coolant access, so check that irrigation still reaches the drill tip in guided cases.
3. Pressing Too Hard
Heavy pressure feels like it speeds things up, but it usually does the opposite. Excess force increases friction, slows cutting, and makes the drill more likely to deviate from its path.
How to avoid it:
-
Let sharp drills do the cutting with light, controlled pressure
-
Use a steady, intermittent technique rather than constant force
-
If a drill stops advancing, withdraw it, clear the flutes, and check whether it has worn out
A drill that needs heavy pressure to cut is usually telling you something. Listen to it.
4. Using Worn or Damaged Drills
Drills lose cutting efficiency with repeated use and sterilization. A dulled drill cuts slower, generates more heat, and crushes bone instead of cutting it cleanly. Many clinicians keep using a drill because it still looks fine, even when its performance has quietly declined.
How to avoid it:
-
Track how many cases each drill has completed
-
Inspect drills for wear, chipped flutes, or faded depth markings before every case
-
Replace drills on a regular schedule rather than waiting for a visible failure
-
Choose instruments built to hold their geometry across repeated sterilization cycles
We manufacture our drills to tight tolerances for exactly this reason, since consistent geometry supports consistent cutting from the first case to the fiftieth.
5. Ignoring Bone Density
Bone quality varies from site to site and from patient to patient. A protocol that works well in dense mandibular bone can overprepare soft maxillary bone, which may reduce primary stability. The reverse can also happen, with under-prepared dense bone causing excessive stress on the implant during placement.
How to avoid it:
-
Review your CBCT before surgery to assess bone density at each site
-
Adjust your sequence to match the bone, following your system's guidance for soft and dense bone
-
Consider specialized instruments, such as cortical release drills, when dense cortical bone resists a standard drill
-
Confirm stability at placement rather than assuming the protocol worked
6. Letting the Drill Drift at the Entry Point
The first few seconds of drilling set the direction for the entire osteotomy. A flat or pointed tip can slide across a sloped or curved cortical surface before it engages bone, and any early drift carries through to the final site position.
How to avoid it:
-
Mark the entry point clearly before you begin
-
Consider a drill with a rounded, self-centring tip for sloped ridges and guided cases
-
Start drilling at low speed until the tip engages, then bring the drill up to working speed
-
Check angulation after the first drill, before you widen the site
Catching drift early costs you a moment. Catching it after the final drill can cost you the case.
7. Overlooking the Crestal Bone
Many clinicians treat the osteotomy as finished once it reaches depth and diameter. But the crestal bone around the implant platform plays a direct role in soft tissue healing and abutment seating. A flat, unshaped rim can leave less room for soft tissue and a less defined seat for healing components.
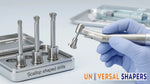
Bone profiling drills address this stage by contouring the crestal bone after the osteotomy is complete. Used correctly, they help create a more natural transition between bone and the future restoration. Used incorrectly, they can remove more bone than you intend.
How to avoid it:
-
Use bone profiling drills only after the osteotomy reaches its planned depth
-
Follow the manufacturer's guidance on speed, pressure, and irrigation for the profiling step
-
Remove only the bone you need to achieve the contour, and stop once you reach it
-
Practice the technique on straightforward cases before using it in esthetic zones
We design our bone profiling drills with a progressive cutting geometry, so you can shape the crestal bone with control rather than aggressive removal.
A Quick Reference for Your Team
|
Mistake |
Main Risk |
Simple Fix |
|
Skipping drill steps |
Excess heat and trajectory error |
Follow the full sequence |
|
Poor heat control |
Thermal bone damage |
Irrigate well and use intermittent drilling |
|
Excess pressure |
Drift and friction |
Use light pressure with sharp drills |
|
Worn drills |
Inefficient cutting, more heat |
Inspect and replace on schedule |
|
Ignoring bone density |
Reduced stability |
Adjust protocol to bone quality |
|
Entry point drift |
Misplaced implant |
Use centring drills and verify angulation early |
|
Skipping crestal contouring |
Poor tissue and abutment seating |
Add a profiling step after the osteotomy |
Why These Mistakes Keep Happening
None of these mistakes reflects a lack of skill. Experienced clinicians make them too, usually because of routine rather than ignorance. After hundreds of cases, a sequence feels automatic, and small shortcuts creep in without anyone noticing. Busy schedules add pressure, and a drill that has worked for months rarely gets a second look.
Team habits matter as much as individual technique. Your surgical assistant often sees drill wear, irrigation problems, and sequencing slips before anyone else does. When you invite your team to speak up, you add a second set of eyes to every case.
Building a Safer Drilling Protocol
A written protocol turns good habits into standard practice. We suggest a simple approach:
-
Write down your drill sequence for each implant system you use
-
Note the speed and irrigation settings for soft, medium, and dense bone
-
Set a replacement schedule for your drills, based on case count
-
Review the protocol with your whole surgical team every few months
A quick review of your protocol, ideally with everyone who touches the surgical tray, catches most problems early.
We also recommend choosing instruments that make good technique easier. Drills with consistent geometry, clear depth markings, and documented sequencing guidance take some of the guesswork out of each step. That is the standard we hold ourselves to at Universal Shapers.
Good instruments cannot replace good habits, but they do lower the margin for error. When every drill in your tray cuts the same way and every depth marking stays readable, you spend less attention on the tool and more on the bone in front of you. That focus is what keeps small mistakes from turning into complications.
Conclusion
Careful bone drilling for dental implants comes down to a handful of habits: follow the sequence, control heat, let sharp drills do the work, respect bone density, hold the trajectory, and finish the crestal bone with care. Each habit is simple on its own, and together they make your outcomes more predictable.
Explore our full range of precision implant drills at UniversalShapers, built to support the habits that protect your results.