Guided Implant Surgery: Why the Right Drill Kit Matters
Guided implant surgery has changed how we plan and execute implant placement, but a digital plan is only as good as the instruments that carry it out. At Universal Shapers, we build our dental implant surgical kits around one principle: a guide controls the plan, but your Implant Osteotomy drills control the outcome.
In this article, we look at what guided surgery demands from your drill kit, and why the right instruments make the difference between a plan that translates cleanly into bone and one that drifts off course.
What Guided Implant Surgery Requires From Your Instruments
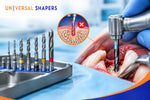
A surgical guide fixes your entry point, angle, and depth on paper, but it cannot correct for a drill that flexes, wanders, or generates excess heat once it contacts bone. We designed our instruments around this gap, since guided surgery only performs as well as the drills you run through the sleeve.
What a guided protocol asks of your drill kit:
-
Consistent diameters and lengths that match your guide sleeve tolerances precisely
-
Drills that track a straight trajectory once they engage the cortical plate
-
A sequence that moves cleanly from pilot drill to final osteotomy without unnecessary steps
-
Instruments built to control heat, since guided cases often run through sleeves that reduce irrigation access
We hear from clinicians who adopted guided surgery expecting the software to solve accuracy on its own, only to find that drill quality still drives the final result. We build our kits to close that gap.
The Core Role of Implant Osteotomy Drills in Guided Cases
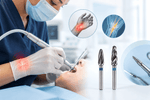
Your Implant Osteotomy drills do the physical work that the digital plan only maps out. We manufacture ours to hold a straight trajectory from first contact through final depth, since even a small deviation at the entry point compounds by the time the drill reaches full depth.
In a typical guided sequence, we recommend:
-
A pilot Implant Osteotomy drill to establish the initial trajectory through the guide sleeve
-
Progressive diameter drills that widen the site while holding that same trajectory
-
A final drill that confirms depth and diameter match your planned implant dimensions
We manufacture each Implant Osteotomy drill in our kits to tight tolerances, so the diameter you select performs consistently whether it is the first drill you use that day or the fiftieth.
Why Bone Drilling for Dental Implants Still Depends on the Right Sequence
Even with a guide in place, bone drilling for dental implants still comes down to fundamentals: controlled speed, adequate irrigation, and a sequence that respects bone density. We design our drills to support these fundamentals, but we also remind clinicians that technology assists technique rather than replacing it.
A few habits we recommend for consistent results:
-
Follow our recommended drill sequence rather than skipping diameters to save time
-
Maintain steady irrigation throughout the sequence, even when access through the guide sleeve is tighter
-
Confirm depth and seating at each drill change, rather than assuming the guide alone guarantees accuracy
-
Adjust your sequence for bone density, since dense posterior bone and soft anterior bone do not drill the same way
We built our Implant Osteotomy drill geometry to reduce heat buildup at each of these stages, but the technique still belongs to the clinician holding the handpiece.
What We Build Into Our Dental Implant Surgical Kits
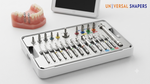
We design our dental implant surgical kits to work as a coordinated system rather than a loose collection of drills. Each kit brings together the instruments a guided case actually requires, in the sequence you use them.
|
Kit Component |
Role in Guided Surgery |
|
Pilot and progressive Implant Osteotomy drills |
Establish and widen the osteotomy along the guided trajectory |
|
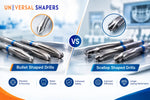
Bullet-shaped drills |
Improve initial centring at the entry point through the sleeve |
|
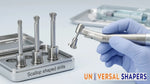
Bone profiling drills |
Contour crestal bone once the osteotomy reaches full depth |
|
Depth and stopper components |
Confirm the drill halts at the planned depth every time |
|
Extension drills |
Provide access in posterior sites where sleeve height limits reach |
We coordinate diameters and lengths across every component in our kits, so you are not left guessing whether a drill from one part of your sequence matches the sleeve or stop you are using in another.
Matching Your Drill Kit to Your Guided Workflow
We know that guided workflows vary between practices, from fully digital, guide-only protocols to hybrid cases that combine guided entry with freehand finishing. Before you select a dental implant surgical kit, we recommend confirming a few details.
-
Whether the kit's drill diameters and lengths match the sleeve heights in your guide system
-
Whether your kit includes both guided and freehand-compatible drills for hybrid cases
-
Whether the kit covers your full case range, from single-tooth to full-arch guided surgery
-
Whether we, as your manufacturer, provide clear sequencing documentation for your specific guide system
We built our kits to fit cleanly into the major guided workflows practices use today, but we always encourage a direct conversation with our team before you commit to a full kit, since guide systems and sleeve heights vary by manufacturer.
Common Mistakes When Choosing a Drill Kit for Guided Surgery
We regularly see the same avoidable issues come up when practices choose a kit for guided cases.
-
Selecting drills based on price alone, without confirming compatibility with the guide system already in use
-
Assuming any osteotomy drill works the same way through a sleeve as it does freehand
-
Overlooking bone profiling and abutment drills, then adding them later as separate purchases that do not match the original kit
-
Skipping manufacturer training or documentation, which leads to inconsistent technique across a surgical team
We designed our kits and support materials specifically to help practices avoid these gaps from the start.
Why We Focus on Precision at Universal Shapers
We built Universal Shapers around the idea that guided surgery deserves instruments engineered to the same standard as the digital plan behind it. Every Implant Osteotomy drill we manufacture goes through tight tolerance control, so the diameter and cutting geometry you rely on stay consistent across every drill in the set.
We believe this consistency matters most in guided cases, where a sleeve limits your visual and tactile feedback during drilling. A drill kit built to hold precise tolerances gives you back some of that confidence, even when you cannot see the bone directly.
Conclusion
Guided implant surgery has raised the bar for accuracy, but the drill kit you choose determines whether your plan translates cleanly into the finished osteotomy. From Implant Osteotomy drills built for consistent trajectory to dental implant surgical kits designed as a coordinated system, the right instruments turn careful planning into a predictable surgical outcome.
We invite you to explore our full range of guided surgery instruments at Universal Shaper where you can find dental implant surgical kits built specifically to support the precision your guided protocol demands.